Harlan’s STEAM lab / 02
Small parts.
Big sound.
Build along with Harlan: a Bluetooth speaker and an FM radio.
Two kit projects, one guide to parts, signals and sound.
Build along / Start here
Meet the parts before the screws.
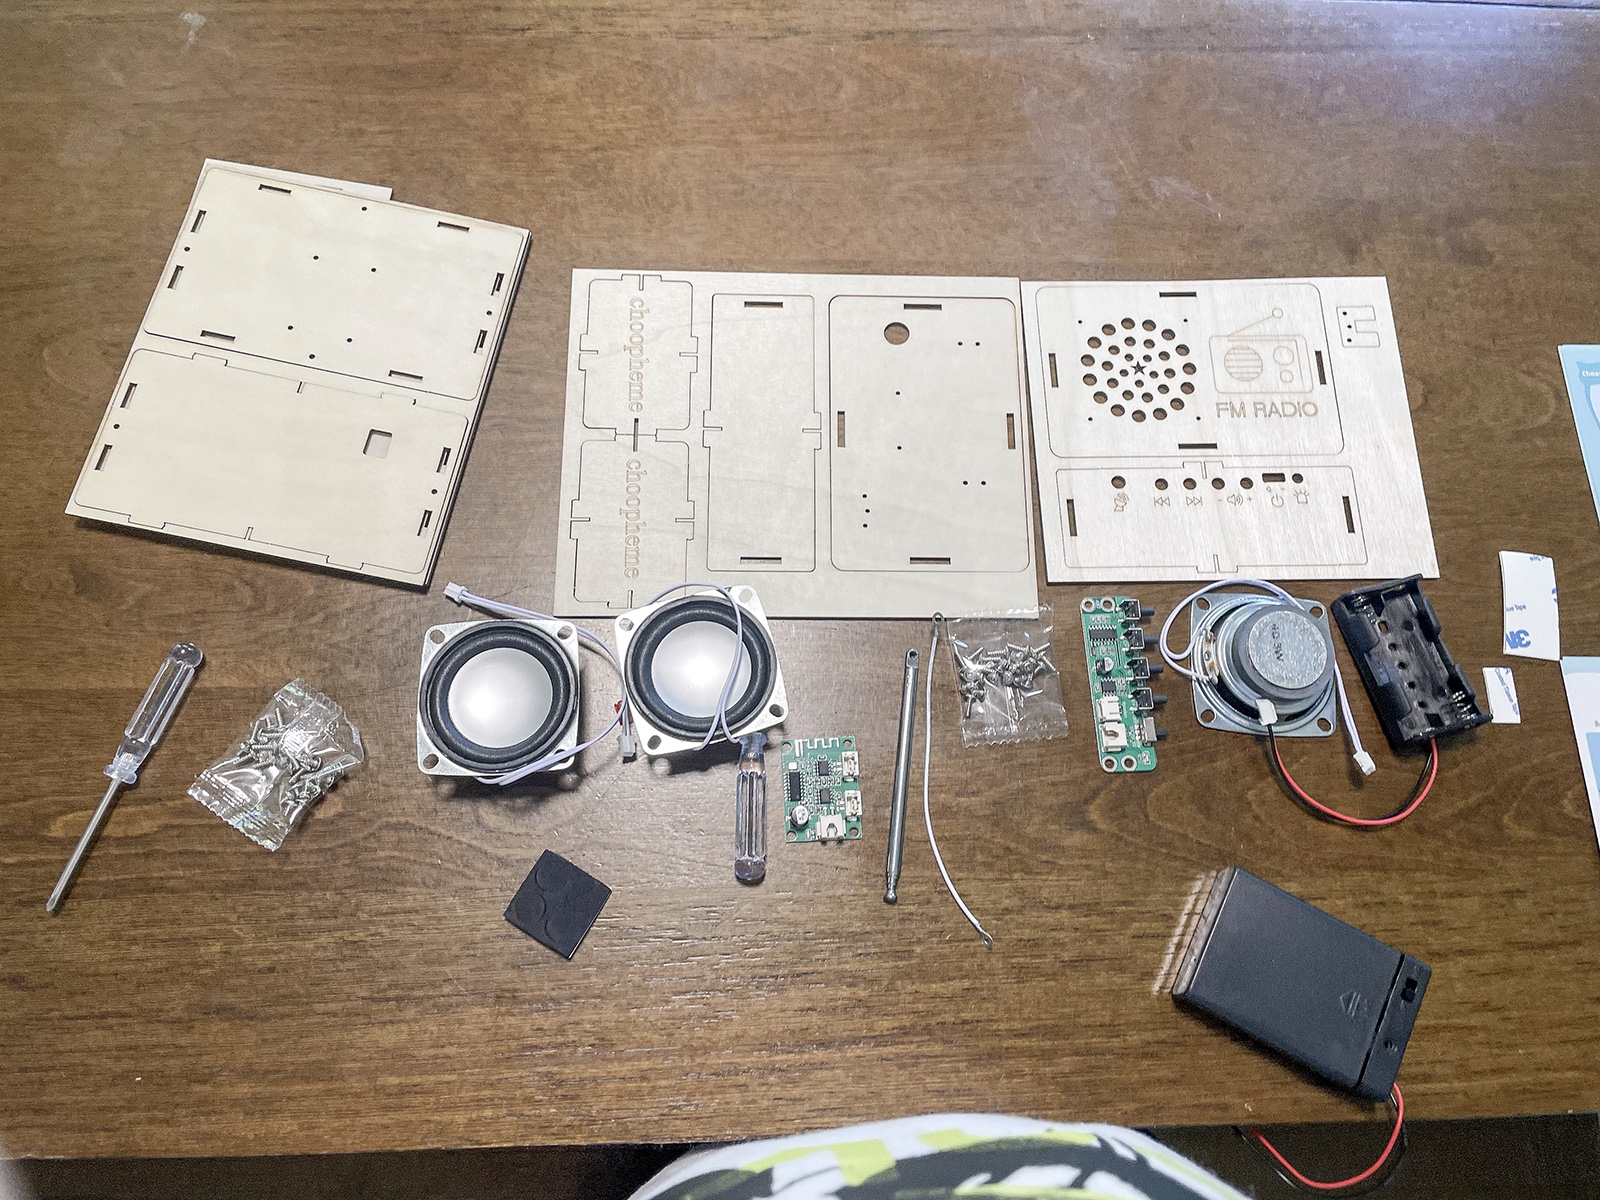
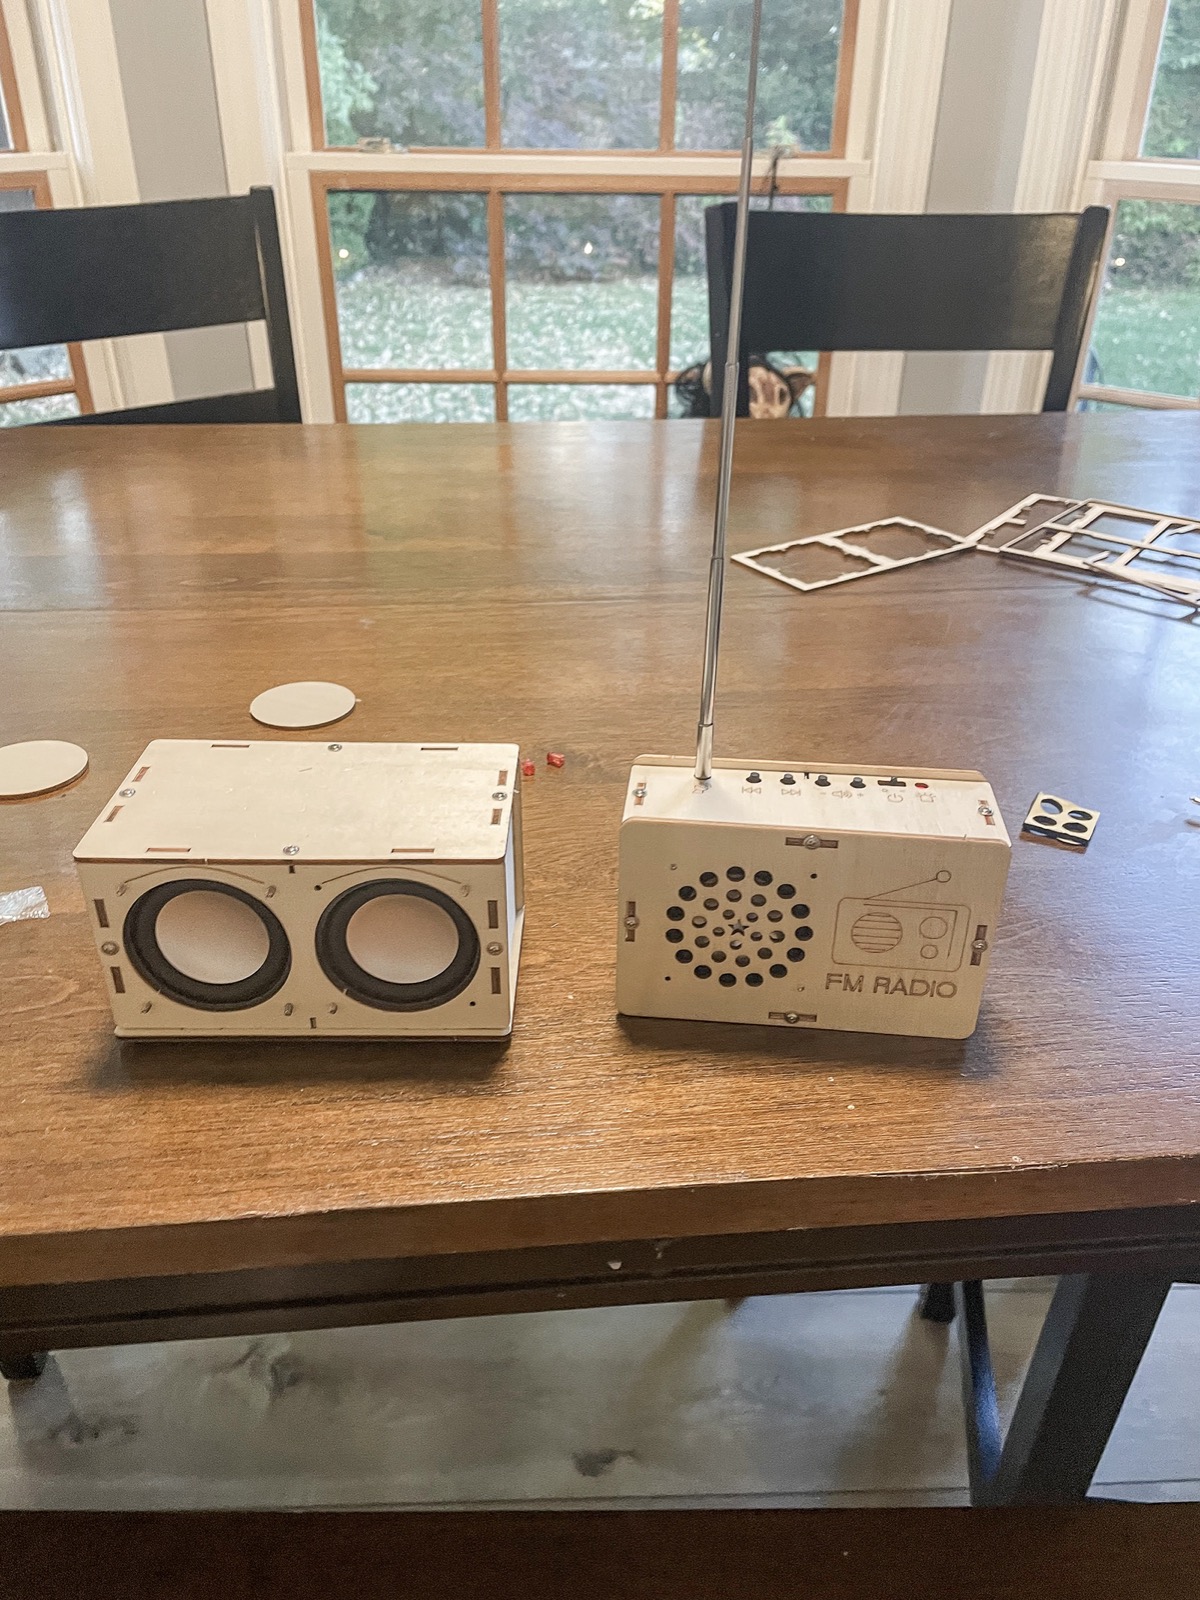
Harlan built both projects on 10-30-2026 and says each took about 1½ hours. These photos are from his actual builds.
Bring to the table
- The radio-and-speaker kit, with its printed instructions.
- A small Phillips screwdriver with a cross-shaped tip.
- The battery type and number shown in your kit booklet.
- A grown-up helper and a clear workspace.
- A Bluetooth phone or tablet for the speaker test.
The Choopheme listing describes both projects and a small Phillips screwdriver. Harlan’s box is marked 8+. See the matching kit listing.
What does each part do?
- Wood panels
- The case that holds everything together.
- Green circuit board
- The electronics that handle the signal and drive the speaker.
- Speaker
- The round part that moves air to make sound.
- Battery holder
- Holds the batteries that power the circuit.
- Antenna
- Helps the FM radio pick up broadcast signals.
01 / The sound check
From parts to playback.
A closer look at the Bluetooth build in action. This website edit is silent.
Recorded 10-30-2026. The two-speaker build sits beside its battery pack and the remaining kit parts. AI-assisted photo editing and website presentation; the objects are Harlan’s real builds.
02 / Meet the builds
One kit. Two projects.
Harlan reports that each project took about an hour and a half.
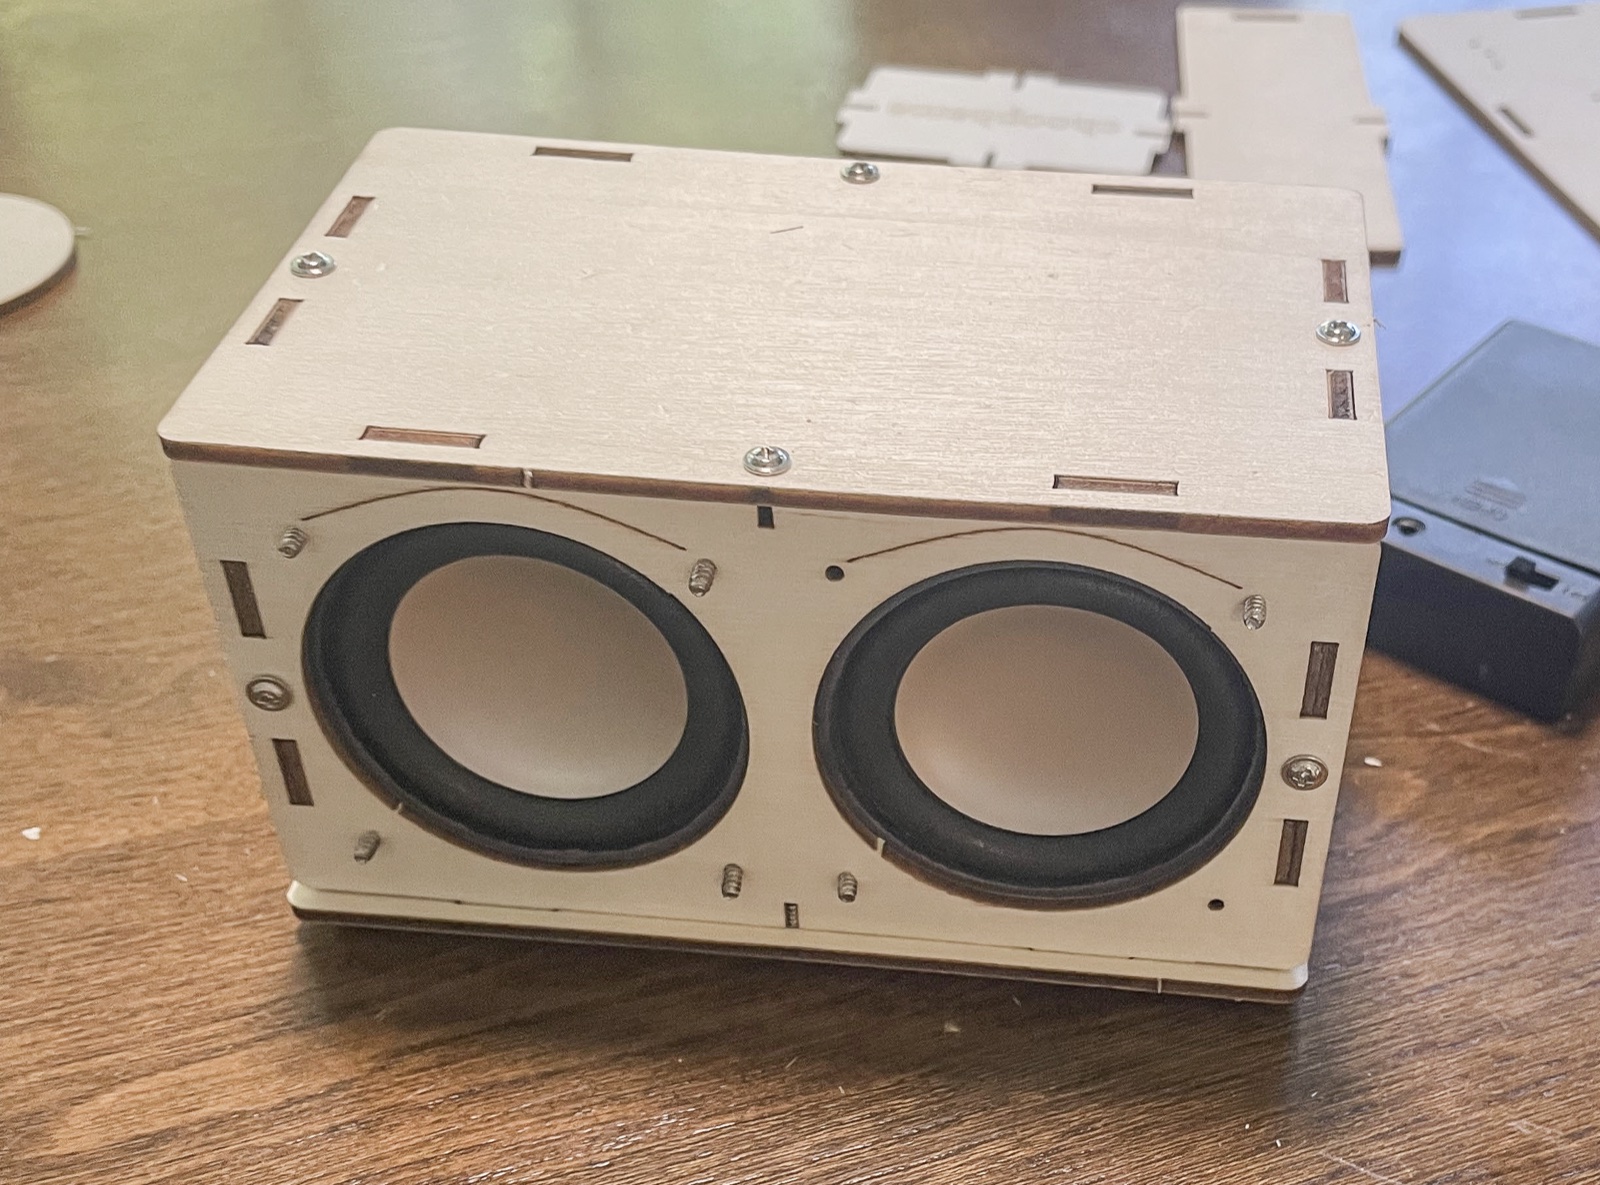
A speaker for a wireless connection.
A wooden enclosure, two speakers, a circuit board and a battery pack. The demo captures the finished build during playback.
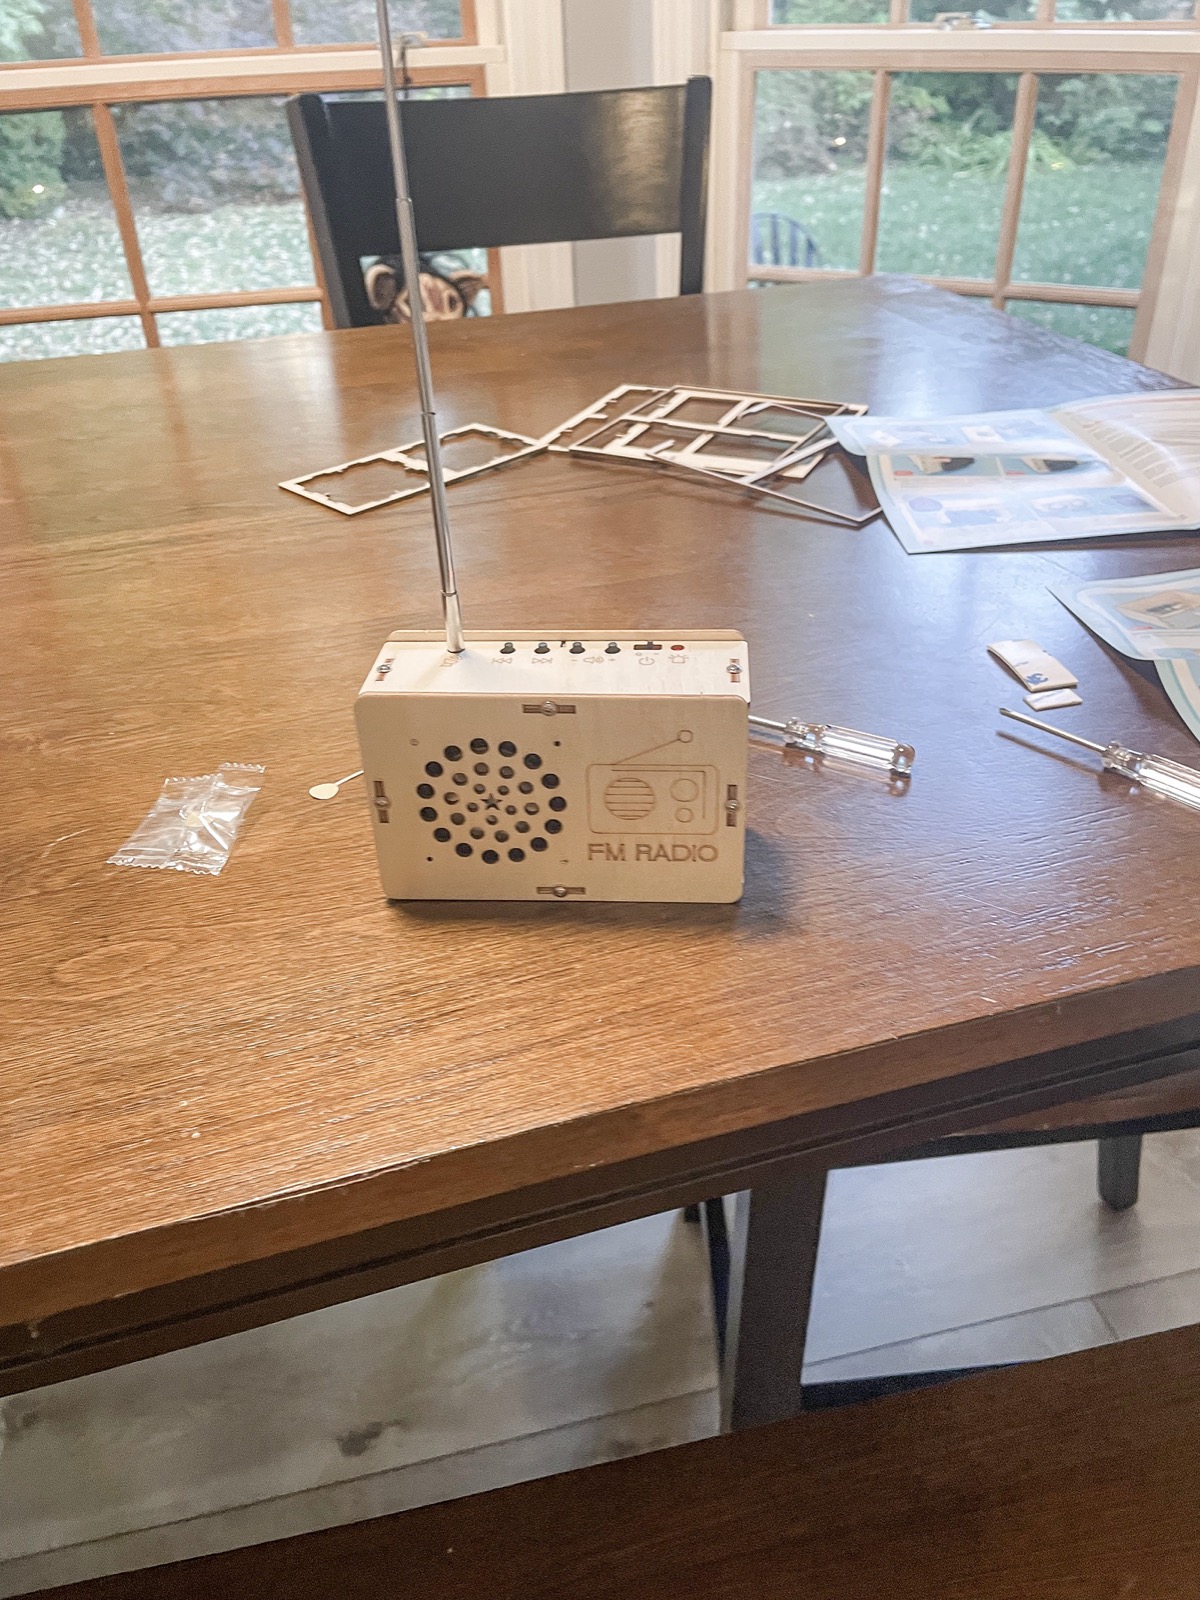
A little radio with a tall antenna.
The second build has a single speaker, a control board and a telescoping antenna. Its wooden front is labeled FM RADIO.
Project 1 / Build checkpoints
The Bluetooth speaker.
Look at the open-case photo: there are two speaker backs, two sets of wires and a green circuit board.
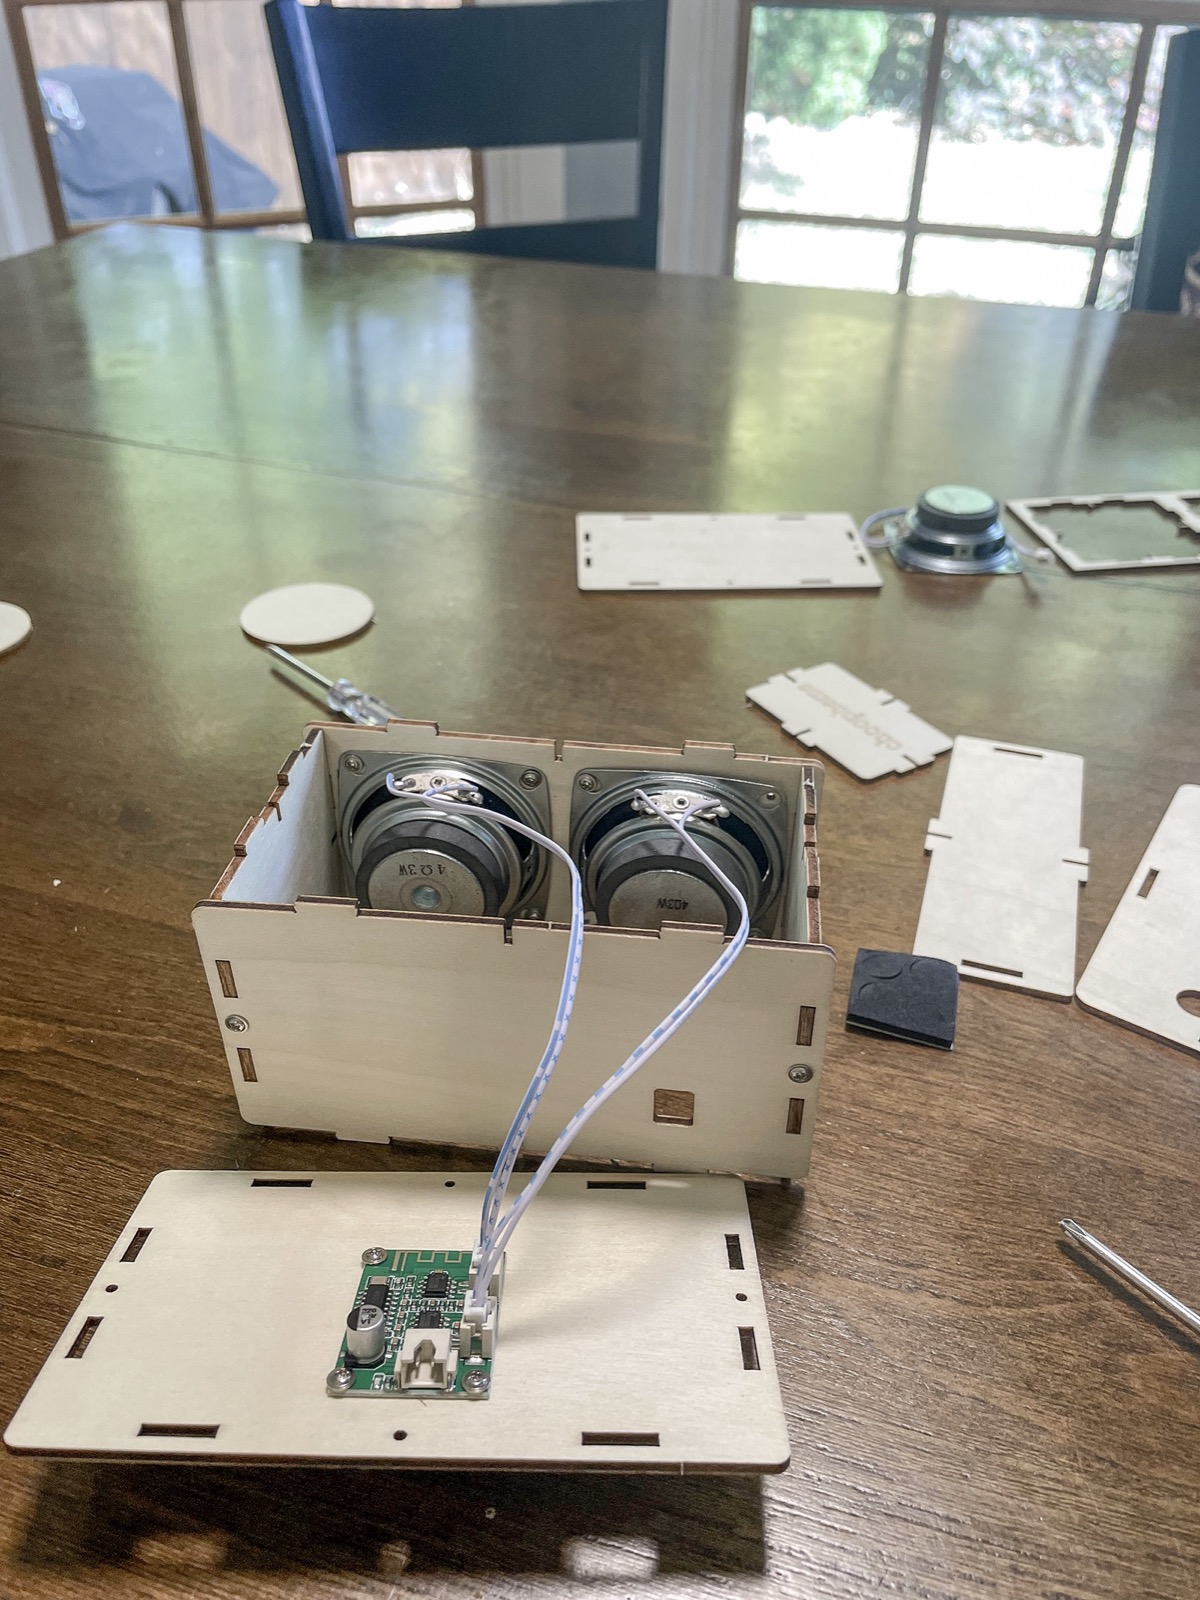
Sort the speaker pieces.
Find the front panel with two round openings, both speakers, the matching case panels, the circuit board, wires and battery holder. Keep the FM radio parts in their own group.
Make the speaker front.
Follow the booklet to fasten the two speakers to the front panel. Harlan’s inside photo shows the speaker backs facing into the box.
Connect the electronics.
With the power off, follow the printed diagram for the speaker wires, board and battery connection. Match each connector to its pictured socket; do not force it.
Close the wooden case.
Line up the panel tabs and the screw holes. Before fastening the last panel, check that the wires are not trapped along an edge.
Pair, play, then listen.
Have a grown-up check the build and fit the batteries as the booklet shows. Power it on, pair the speaker in the phone’s Bluetooth settings and start some audio at low volume. The video shows Harlan’s finished speaker during a playback test.
Project 2 / Build checkpoints
The FM radio.
This one uses a single speaker and a tall antenna. It receives a radio station instead of pairing with a phone.
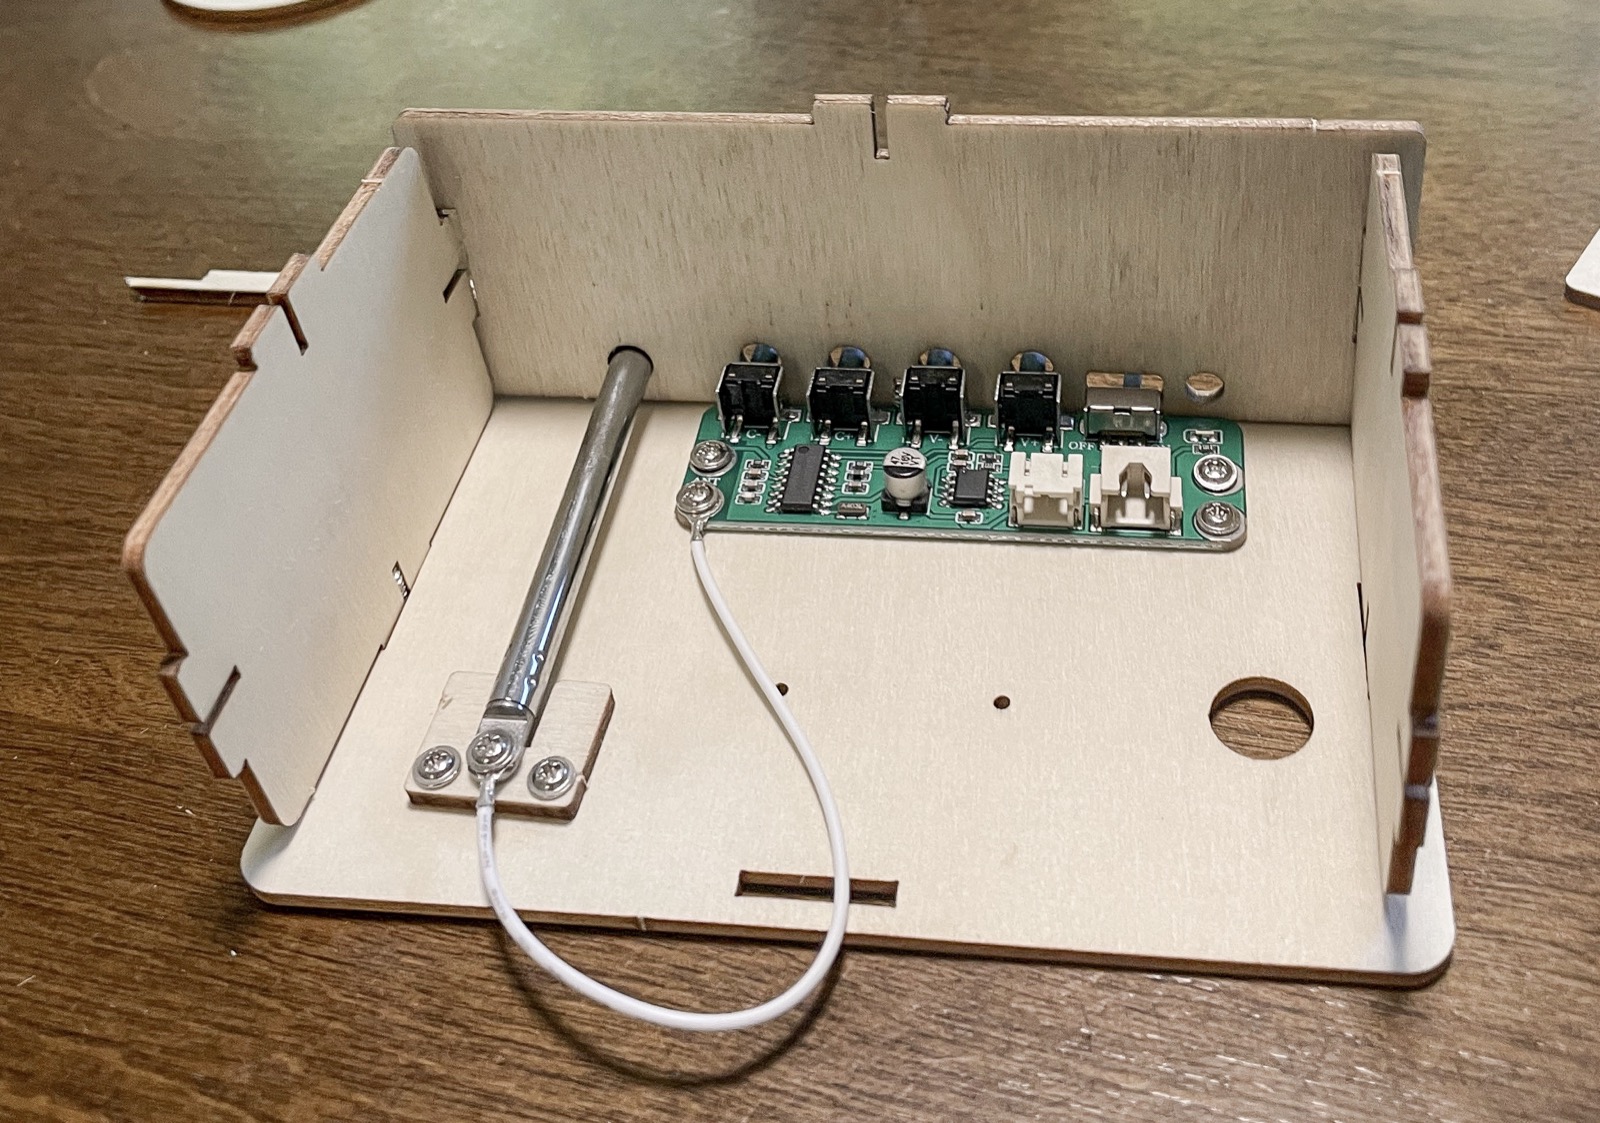
Find the radio parts.
Choose the panel marked FM RADIO, its matching case pieces, the single speaker, the radio board, the antenna and the battery holder.
Fit the board and antenna.
Use the booklet’s mounting diagram. The inside photo shows the green board fixed near the top edge and the antenna attached inside the case.
Connect the speaker and power.
Keep the power off. Match the speaker and battery connections to the printed diagram, and check that the antenna connection matches too.
Finish the case.
Align the wooden panels and control openings. Route the wires inside without pinching them, then secure the remaining panels with the screws shown in the instructions.
Search for a station.
After a grown-up checks the finished build and batteries, extend the antenna and use the kit’s station-search controls. Start at low volume. Reception can vary. If the sound is unclear, compare two safe spots.
03 / On the build table
See what went inside.
Real photographs from the assembly, in order from parts to finished builds.
The science / Invisible signals, real sound
How does music get into the box?
Both projects receive radio waves. The difference is where their signals start.
Bluetooth speaker
- Phone or tabletSends the audio information
- Bluetooth radio signalTravels wirelessly to the paired speaker
- Circuit boardTurns the received information into a changing electrical signal
- Speaker conesMove air, so you hear sound
Bluetooth uses radio to carry data, including wireless audio. Source: Bluetooth SIG.
FM radio
- Broadcast stationSends a radio signal
- Antenna and tunerPick up the signal and select a station
- Radio circuit boardRecovers the audio and drives the speaker
- Speaker coneMoves air, so you hear sound
You do not need to pair a phone to receive an FM broadcast. Tuning selects a radio frequency. Source: NASA’s radio-wave guide.
Radio waves are not the sound you hear.
Radio waves carry information to the electronics. Inside a typical speaker, a changing electric current flows through a coil of wire. The coil interacts with a magnet and moves the speaker cone back and forth. The moving cone pushes the air. Those air vibrations reach your ears as sound.
Wireless does not mean battery-free. The signal travels without an audio cable, but the batteries still power the circuit and the moving speakers.
Source: Exploratorium, how a speaker makes sound. This explains how a typical speaker works inside.
Your turn / Try one change
Build it. Test it. Tell someone.
Try these experiments next, and describe what you notice.
Near or farther away?
Keep the volume low. With a grown-up, move the paired phone a few steps away, then back. Does playback stay steady? Change only the distance.
Does position matter?
Keep the same station selected and compare two safe places for the radio. Does one sound clearer? Do not change the station and position at the same time.
Point to the path.
Show someone the battery holder, circuit board and speaker. Explain which part supplies power, which handles the signal, and which moves the air.
If there is no sound, switch the power off before checking connections against the booklet with a grown-up. For Bluetooth, also check pairing and the phone volume. For FM, check the antenna and station selection. Keep the speaker cones free to move.
04 / A different view
Pause. Look closer. Replay.
Capture moments from the real demo, or watch a stepped-frame animation. This is an edited playback effect, not stop-motion footage of the assembly.
Four moments, one real test.
Pull stills at 2, 5, 9 and 13 seconds. Select a frame to jump to that moment in the main player.
The starting point
Built from a kit.
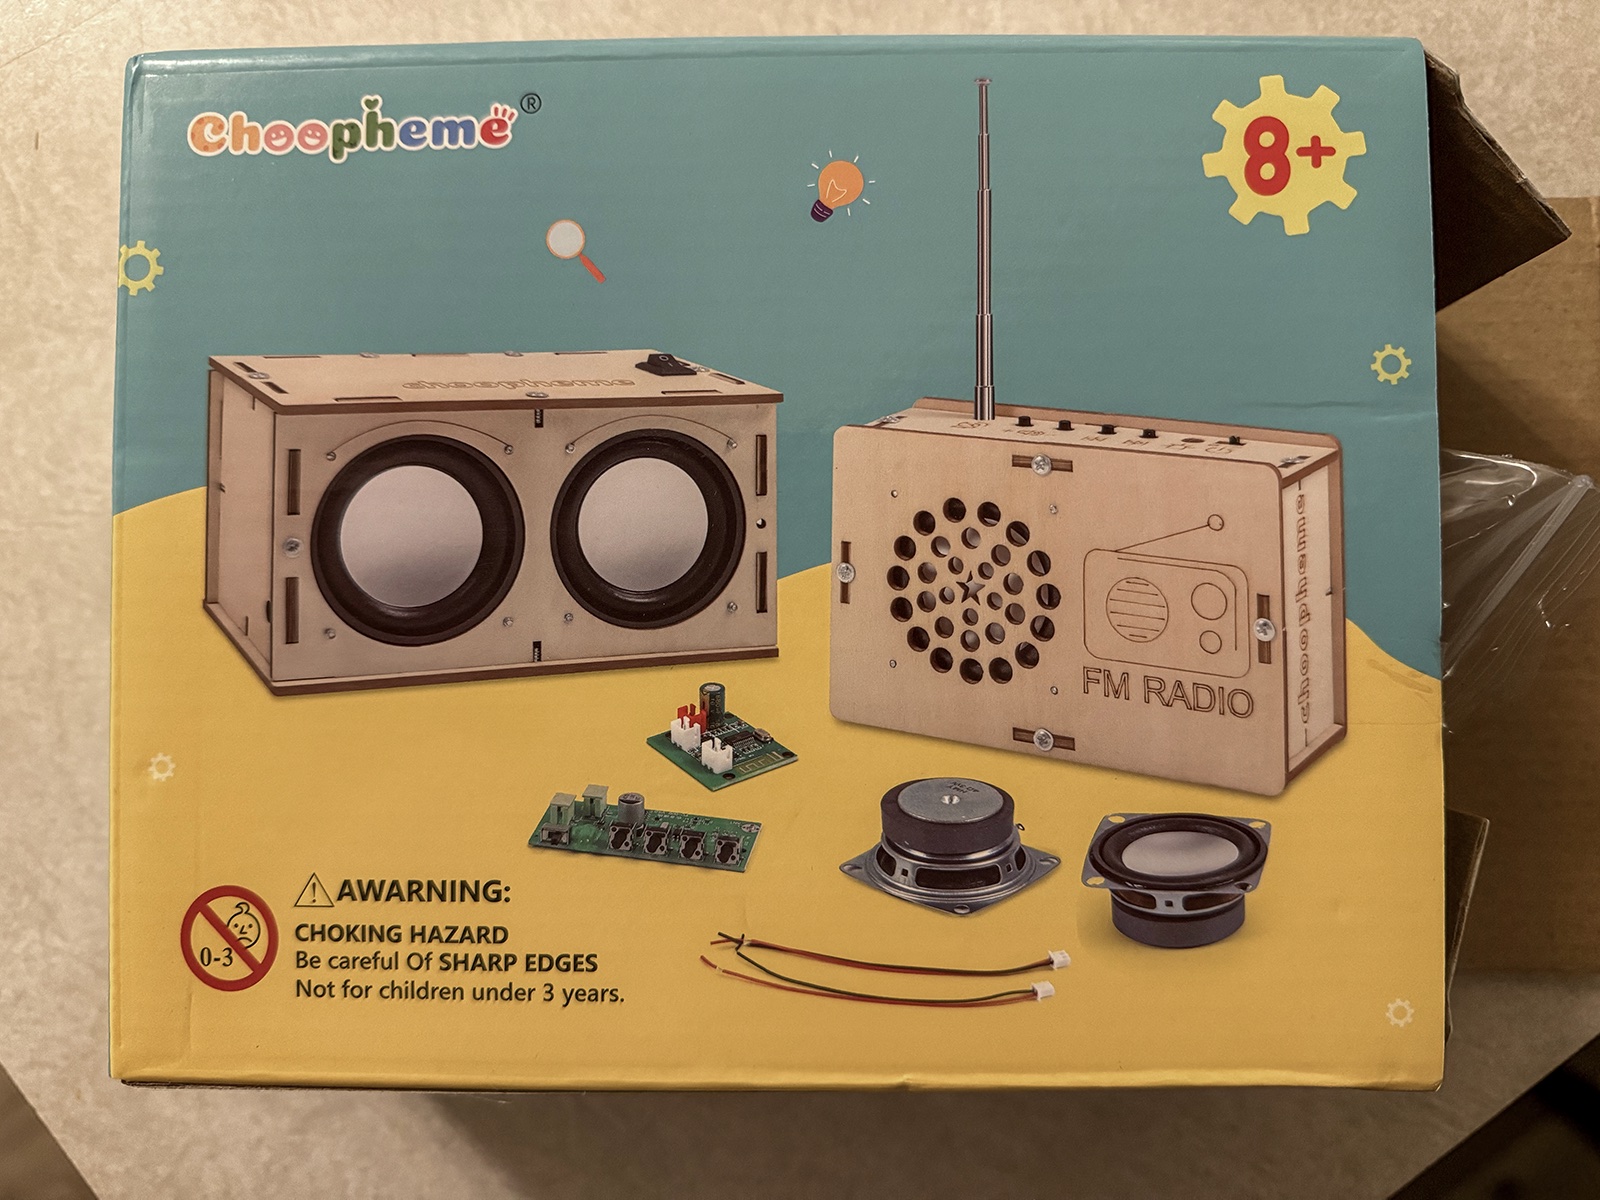
Harlan assembled these two projects from a Choopheme kit. The box shows both builds and is marked 8+. The matching product listing includes a Bluetooth speaker and an FM radio.
Kit photo taken 10-31-2026. Follow the kit instructions with a grown-up. The packaging warns about small parts and sharp edges.
Try the Maker Check →Research checked 10-31-2026. Build photos and Harlan’s description document his projects; the linked sources explain the kit and science. The exact wiring and screw sequence should come from your own kit booklet.